


Are you a fan of delicious treats and enjoy experimenting in the kitchen? Then you’ll love this DIY hack! Crafting your own dry bofrot brings the authentic taste of this traditional delight right to your home. Here’s a simple guide to turn your kitchen into a mini bofrot bakery:
Gather Your Ingredients:
- 4 cups of all-purpose flour – the foundation of your dry bofrot
- 1 ½ teaspoons of salt – for a savory touch
- 2 tablespoons of sugar (adjust to taste) – for a hint of sweetness
- 1 packet (about 2 ¼ teaspoons) of active dry yeast – the secret to fluffy bofrot
- 1 ¼ cups of warm water – activates the yeast and binds the dough
- 2 tablespoons of vegetable oil (plus extra for frying) – keeps the dough moist and aids frying
- Optional: Additional spices like nutmeg or cinnamon for added flavor
Let’s Get Baking!
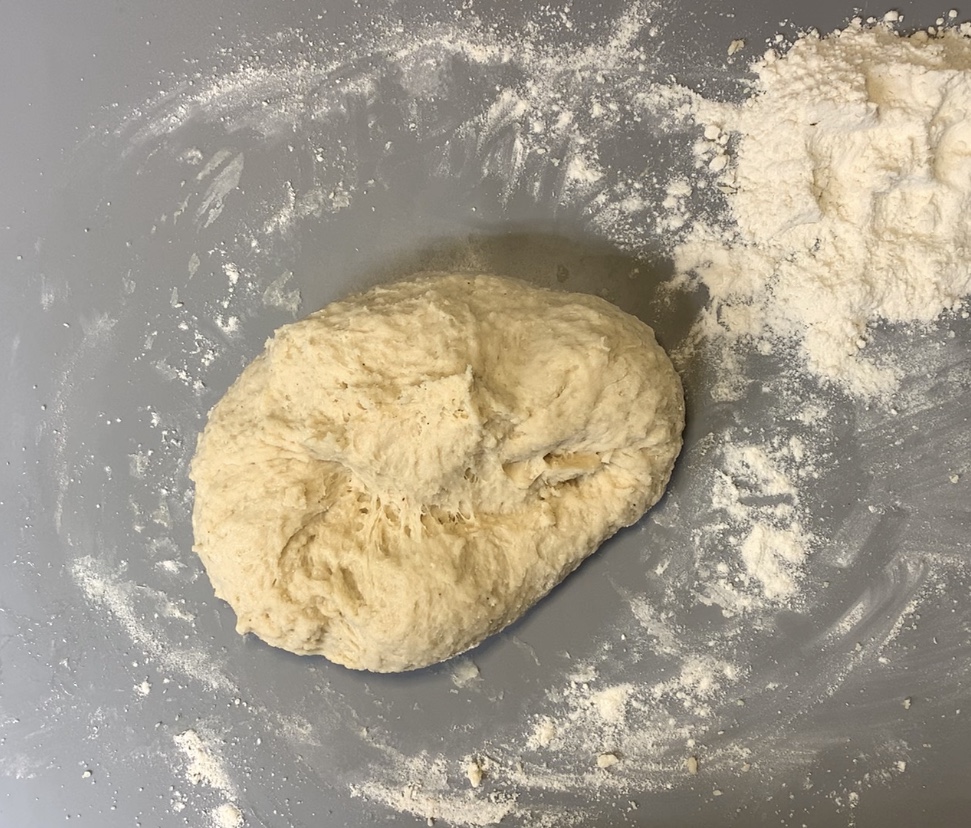
1. Making the Dough:
- Combine all dry ingredients – flour, salt, sugar, and yeast – in a large mixing bowl.
- Gradually add warm water while stirring until a dough forms.
- Incorporate vegetable oil and knead until the dough is smooth and elastic (about 5-10 minutes).

2. First Rise:
- Place the dough in an oiled bowl, cover, and let it rise in a warm spot for an hour until doubled in size.
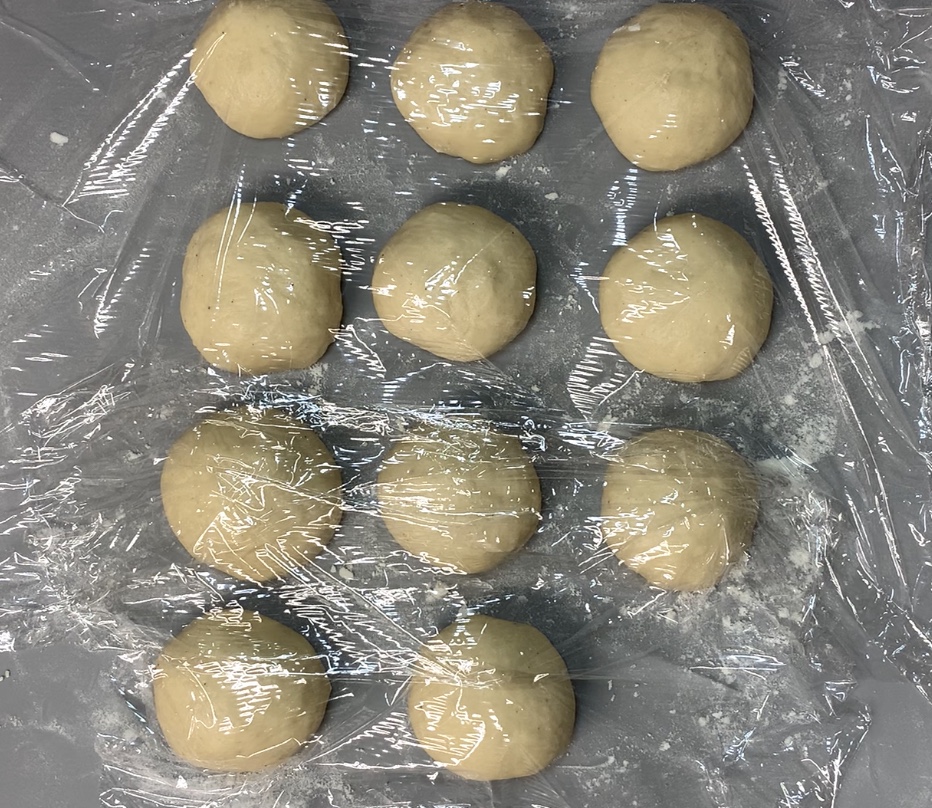
3. Shaping the Bofrot:
- Deflate the risen dough and divide it into small balls.
- Roll each piece into balls, traditionally about the size of a golf ball.
4. Optional Second Rise:
- Place the shaped dough balls on a tray, cover, and let them rest for 15–30 minutes for extra fluffiness.

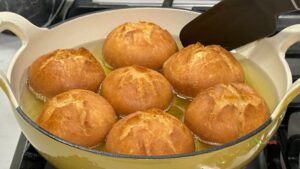
5. Frying the Bofrot:
- Heat vegetable oil in a deep frying pan or pot.
- Fry the dough balls in batches until golden brown on all sides (about 2–3 minutes per side).
- Drain excess oil by placing the fried bofrot on paper towels.

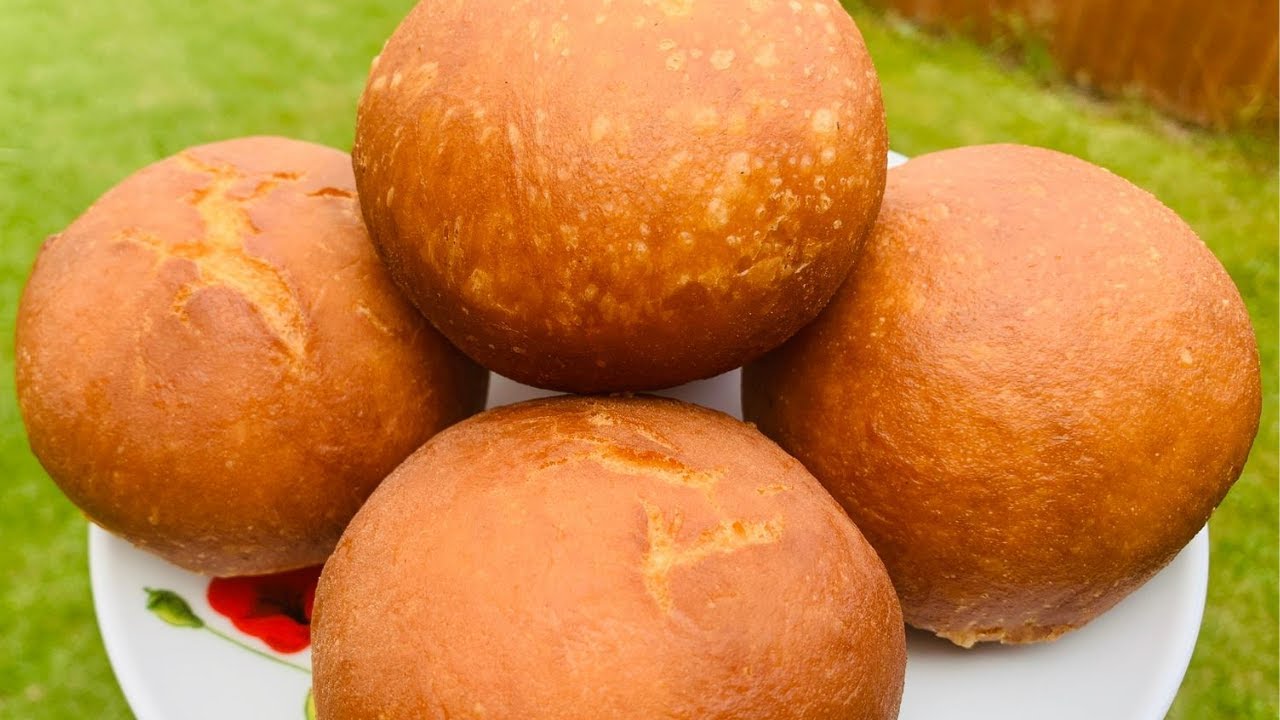
Enjoy Your Homemade Dry Bofrot!
- Serve warm or at room temperature, plain or with toppings like roasted peanuts or Asaana sauce.
- Indulge in the delightful combination of crispy exterior and soft interior of your freshly made dry bofrot!
Now, it’s time to savor your homemade culinary creation!


